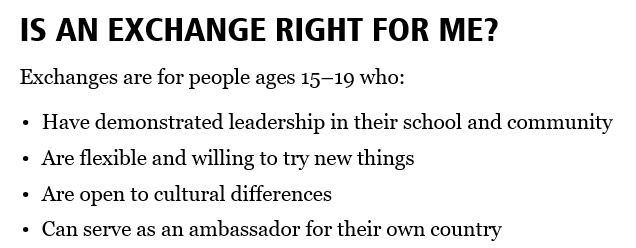
So, it happened:
You came home from school one day and there was a letter from the exchange program waiting for you, telling you that your application had been successful. In about six months’ time, you’ll be heading off overseas to live as a foreign exchange student.
That means two things:
You life is about to get a whole lot more interesting.
And:
You have a lot of organising to do and many things to take care of in a short period of time.
Don’t fret, though – this handy, pre-exchange “to do” list will ensure that you don’t forget anything and will be ready to go when it’s time to get on the plane.
Read on…
Six months before departure

Your exchange program should notify you that you’ve been successful about six months before your departure date.
Here’s what you need to do straight away:
1. See your doctor
Make an appointment with your doctor once you’ve been accepted to your exchange program.
The main reason for seeing your doctor is to obtain advice about any vaccinations you’ll need before leaving, and to arrange those in a timely manner. For example, if you’ll be travelling to a country where Hepatitis A & B are a problem, the vaccination against those diseases consists of three doses of medicine administered over a six-month period.
Your doctor will usually also be able to provide you with information about any infectious diseases which exist in your future host country, and how to deal with those. Ask him or her to provide you with written information which you can take home and familiarise yourself with.
Finally, if you have any medication which you take on a regular basis, get advice from your doctor about whether that medication will be available in your host country, or whether you’ll need to purchase a big supply and take it with you.
2. Apply for a passport
If you don’t already have a passport, or if your current passport expires during the period when you’re scheduled to be on exchange, you’ll need to arrange a new one.
It’s worth doing this early, for a number of reasons.
Principally, you’ll need your passport in order to apply for a visa for your host country. The process of applying for both a passport and visa are bureaucratic processes which can take a couple of months each. So, don’t delay!
3. Make a start on language learning
If you’re going to be learning a new language in your host country, it pays to get started early on your language learning.
Let me be totally blunt:
No matter how much prior knowledge you have, you most likely will struggle when you arrive in your host country.
However, every little bit helps.
Every concept and piece of vocabulary you learn and can understand before you arrive in your host country is gold and will save you misunderstanding and embarrassment.
The earlier you start your language studies, the more vocabulary you’ll be able to rote learn and absorb and the more time you’ll allow for key concepts to sink in.
So, find a language class or course close to you. Or, if none is available, start learning via an online course. In any case, get going as soon as you can.
Five months before departure

4. Arrange your visa
As soon as your passport is ready to go, call your future host country’s embassy or consulate and ask about the type of visa you’ll need for your exchange year. You might need to visit the embassy or consulate. If so, take along your letter of offer from the exchange program.
The embassy may also want to know where you’ll be located while you’re on exchange. Those details usually won’t be available for a couple of months, so it may be necessary to delay applying for a visa until you’ve received notice of your host family’s address from the exchange program.
5. Stock up on cold-weather gear
If your host country or city is located in a cold-climate area – for example, in Canada or in non-Mediterranean Europe – you may need to stock up on cold weather gear.
The best time to do this is at the end of winter in your home country, when ski wear and other cold-weather clothing will be on sale. So, stock up now.
Gloves are by far the most useful cold weather item for exchange students, as they are essential when riding a bike in cold weather.
Thermal tights (long underwear) are also very useful in cold climates, and it is likely you’ll wear them under your jeans, chinos or pants every day during winter. So grab a couple of pairs.
6. Discuss academics with your school
If you’ll be returning to your school after your time on exchange, five months out is also the perfect time to discuss any academic requirements your home school might have.
Will you need to study any particular subjects in your host country? Will the school recognise any of the study you do overseas and give you credit for that study?
If you’re going on exchange to a country where you’ll be learning a language which is taught at your home school, you should also ask whether you’ll be able to enrol in an advanced-level language course upon your return, which could get you extra credit for college.
Four months before departure

7. Get your travel sorted out
Some time during the fourth month before your departure date, your exchange program should advise you the name of the city or town where you’ll be going on exchange to, and give you indicative start and finish dates for your exchange.
Many exchange organisations will arrange travel for their students. However, there’s a chance that you may need to organise travel to your host country yourself. If this is the case, you need to book your travel as soon as you know your departure and arrival dates.
Booking your travel as early as possible will usually allow you to save some money on your tickets. Importantly, it should also enable you to choose the shortest flight or allow you to minimise the number of times you need to change aircraft.
Don’t forget to purchase travel insurance at the same time you’re purchasing your flights. Things can and do happen while you’re overseas – including costly medical emergencies – and travel insurance can save you literally thousands of dollars in case something does go wrong.
8. Set up a blog
As an exchange student, you need a blog. Here’s why:
A blog is the quickest and easiest way to stay in touch with people during your student exchange.
Like Instagram and Facebook, it allows you to share pictures and short movies with your friends and family at home, as well as people you meet during your exchange.
Unlike those platforms, however, a blog allows you to write longer updates about things you’ve done, and gives readers some depth of insight as to what you’re doing and experiencing.
If you don’t already have a blog, I recommend setting one up at least four months out, as that’s the time you’ll start meeting people in connection with your exchange – for example, other outbound students from your area.
Most bloggers prefer hosted (paid) blogging solutions, but for your exchange blog, a free blog from Blogger or WordPress.com will be perfectly fine.
At this stage, all you really need to do is set up an “About Me” page, and fill it in with 2-300 words introducing yourself and a recent picture of yourself. You can add the real content – blog posts about your travels and other things which happen during your exchange year – later on.
9. Get business cards printed up
During your time on exchange, you’ll meet literally hundreds of new people, many of whom you’ll want to stay in touch with. Business cards are an inexpensive and convenient way of sharing your contact details with those people.
You can order business cards cheaply using online services such as Vistaprint. Alternatively, your local Kinko’s or other “big box” office supplies store should be able to print you a couple of hundred cards at a reasonable price. Get at least 200, and preferably 300, printed up.
Your business cards should contain the following information:
- Your name (in large or bold print)
- The name of your exchange program and the period during which you’ll be on exchange (eg: “Rotary Exchange Student 2020-21”)
- Your email address
- The address of your personal blog or website
- Any other personal contact details you wish to add (eg Facebook page, Instagram account ID)
You’ll most likely get a new cell phone number when you move to your host country, so don’t bother getting your current number put on your business cards. Instead, handwrite your new cell phone number on the back of each business card once you’ve arrived in your host country.
Three months before departure

10. Get in contact with your host family
Some time in the third month before your departure, you should receive the name, address and other contact details of your first or only host family. They may write to you introducing themselves.
In any case, you should write to your host family once you have their contact details. Just a short letter or email should suffice. You should introduce yourself and give details of:
- Your own family at home (composition of your family, what your parents do, number and ages of your siblings)
- Sports, hobbies or pastimes you enjoy (mentioning any that you would like to continue while you’re on exchange, if possible)
- If a different language is spoken in your host country, whether you have any prior knowledge of that language and/or any courses you are doing to learn the language
If you’ve set up a blog (see step 8 above) you can direct your host family to your blog and the autobiographical content it contains.
11. Arrange a credit or debit card to cover any emergencies
Your host parents or exchange organisation will set up a bank account for you either just before or just after your arrival in your host country. That account will be your primary bank account during your time as an exchange student.
Before your departure, I recommend that you visit your usual bank in your home country and also organise either:
- a credit card which is linked to your parents’ credit card account, or
- a Visa or MasterCard debit card which is linked to a separate account with at least $1000 in it
This is your “go to hell” card. It’s one that you will use in case of emergencies when you need to purchase something fast.
Here’s the truth:
Unforeseen things are going to happen while you’re on exchange. The airline will lose your bag with all your clothes in it. Or, you will lose your train ticket. Or, you will have some other kind of emergency which will require you to pay money straight away.
In such situations, your credit card will be a vital safety net. Don’t leave home without it.
12. Stock up on gifts for your host family or families, and other people you meet
It’s traditional, and expected, for exchange students to give their host family or families a small gift upon departure.
Three months out is the perfect time to start thinking about presents from your home country that you can take with you and give to your hosts. Try to think of a present for your host family or families which is:
- Relatively unique to your home country – that is, it is only produced in your home country and/or hard to purchase elsewhere, or
- Something for which your home country is famous, or
- Something which isn’t necessarily unique to your home country, but which reflects you or your personality and which your host family can remember you by
Don’t forget that you’ll need to carry the gift or gifts with you on the plane and that you may want to conceal them to maintain the surprise. A top-shelf bottle of California wine is a great gift idea if you’re from California, but may prove too heavy and impractical to take with you overseas.
As a rough value guide, if you’ll only have one host family, something to the value of about US$100 would be fine. If you’ll have more than one host family, something valued at US$50-60 would be appropriate. However, value is secondary to how thoughtful the gift is.
I also recommend picking up a few smaller gifts for people you meet during your exchange year, including other exchange students and close school friends.
Two months before departure

13. Check that your mobile phone will work in your host country
If you’re planning to take your existing mobile (cell) phone on exchange with you, you’ll need to ensure that it’s compatible with the operating frequency bands of mobile networks in your host country.
You can check this at sites like GSM Arena.
If your existing handset isn’t compatible, investigate whether you can purchase a compatible one in your home country before departure, or whether you’ll need to set some money aside to purchase a new one when you arrive in your host country.
14. Organise travellers’ cheques or a bank cheque as some “start-up” money to help get you going
Two months out, take another trip to the bank to organise some money that you can deposit into your bank account in your host country when you arrive. A couple of hundred dollars’ worth of travellers’ checks, or a bank check for the same amount, should be enough.
You are bound to have a few start-up costs when you arrive in your host country – for example, toiletries, school textbooks, or unforeseen clothing expenses.
It’s helpful to have a bit of a “float” to cover these expenses, as well as any “non-emergency” expenses you encounter as your year progresses.
15. Make a pre-departure visit to your dentist and doctor
Seeing as it’ll be up to a year until you see your regular dentist and doctor again, it pays to have one last check-up with each of them before you depart.
Schedule this visit for your second-last month at home, so that there’s time to make a follow-up appointment in case your dentist or doctor finds something that he or she wants to investigate further.
16. Intensify your language learning
If possible, try to organise three or four sessions of one-on-one language tutoring before your departure overseas.
The benefits of this type of intensive, in-person learning include the following:
- the tutor should be able to clarify and explain anything you’ve learned in your language studies to date which hasn’t made sense, or which you haven’t grasped 100 per cent
- you can try making some basic conversation with your tutor, in a lower-pressure environment than your host family’s home or school in your host country
- you can learn two or three more times per hour in one-on-one tuition than you can in a classroom environment
Your language teacher may be able to offer you some one-on-one tutoring, or be able to point you in the direction of someone who can tutor you.
Final month before departure

17. Rest up
Be warned:
The first few weeks in your host country are going to be extremely tiring.
All at the same time, you’ll be:
- dealing with culture shock
- experiencing jet lag, and
- meeting dozens of new people and adapting to your new environment.
Being immersed in a new language and spending all day, every day trying to understand what people are saying and attempting to communicate back to them are also exhausting.
The last thing you need when you get on the plane is to be in sleep deficit.
So, make sure you get plenty of rest in at least the two weeks before your departure date. Get all of your farewell parties, dinners and nights out done early this month, and ensure that you have at least two clear weeks of early nights and sleep-ins prior to departure.
18. Trial pack at least two weeks out
You also need to start the process of packing your suitcase for exchange a couple of weeks out. Packing the night before departure is a recipe for forgetting things and/or panicking because things don’t fit.
Make sure that everything actually fits in your suitcase, and that your packed suitcase falls within any applicable weight and size restrictions.
As an aside, you should also make sure that everything you’re taking overseas is in good order. Your clothing should fit well and be mended (no holes in socks or permanent marks on t-shirts). Your electronic devices should work and be fitted with fresh batteries or fully charged up. Don’t waste valuable packing space on items which you’ll need to dispose of when you arrive overseas.
19. Send a final confirmation message to your host family
Airlines can and do re-schedule flights at short notice.
For this reason, you need to send your host family a quick email a couple of days before you leave, which re-confirms your flight details and your expected arrival time.
——–
So, that’s it. Follow these steps and you’ll be organised and ready to embark on your big adventure when your date of departure arrives.
Good luck,
Matt
Are there any additional pre-departure steps you can think of? Please add them in the comments below.


